
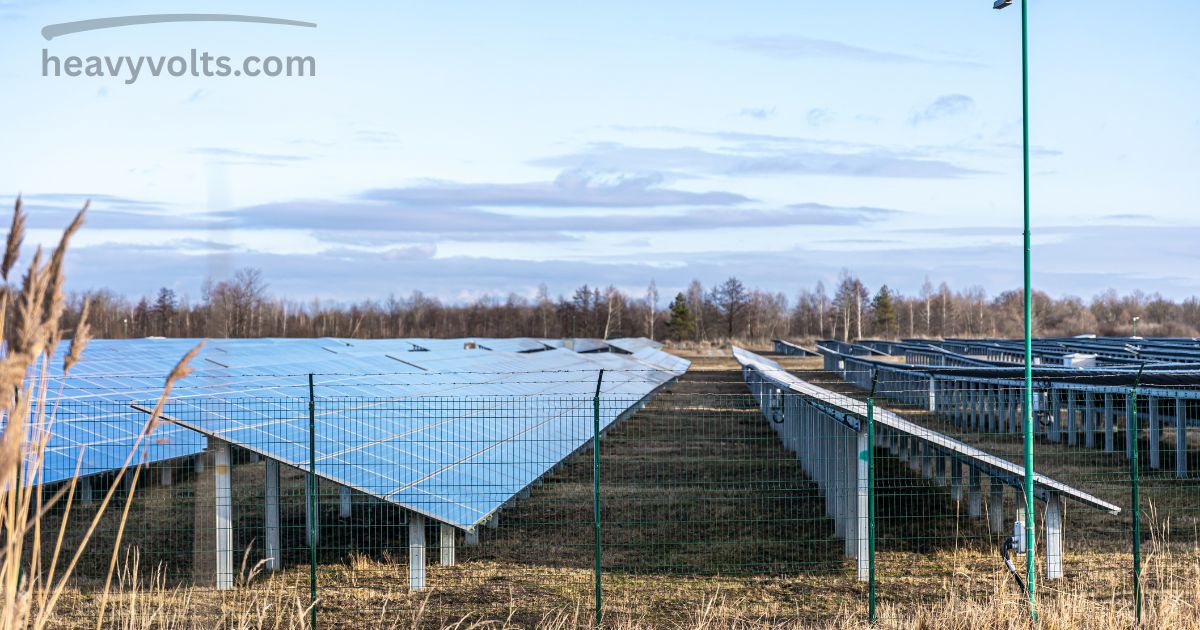
I’ve walked around enough back gardens as a guide for homeowners thinking about domestic solar to know one thing: most homeowners picture rooftop panels the moment solar comes up, and hardly anyone starts by picturing ground mounted Solar panels. Yet not every property has a suitable roof my favourite example is a chocolate-box thatched cottage I visited, where a south-facing pitch simply didn’t exist, and buildings and trees kept the roof in shadow for half the day. In cases like that, ground mounting solar panels becomes a genuinely practical alternative, and after one proper site visit most customer worries about losing out on sunlight disappear.
On residential homes with spare land, or on commercial properties chasing high-volume generation, ground mounted solar panels and rooftop systems actually sit on a level playing field once you get the foundation type and cable run length right. Ground-mounted arrays and solar farms don’t have to compete with rooftops I’ve seen domestic ground mounts sit happily beside utility solar farms on the same land space, each doing its own job. Whether the system is small or large, choosing ideal conditions keeps it efficient, cost-effective, and genuinely optimal for the site.
Get those small decisions right the MCS certification, the exact ground-mounted solar PV layout, the roof-mounted systems comparison and a well-placed array pays back in around 7 years instead of dragging on for 11. That is really the whole story behind ground-mounted solar: it is not a compromise, it is often simply an easy to install, well-thought-out choice for a property that a standard roof could never fully serve.
What Is Ground Mounted Solar panels?
Think of ground mounted solar panel as a catch-all term for any solar array that isn’t sitting on a roof these are ground-based panels, sometimes called freestanding solar panels, and I’ve installed them in ordinary back gardens, open fields, and even paved courtyards. The PV modules themselves and the inverter electronics are no different from a rooftop install; what changes is the mounting structure driven into the ground and the length of cable run back to the property.
People usually turn to this option when roof suitability is the problem think heavy shading, wrong orientation, real structural issues, or strict listed-building constraints that rule a normal roof out completely. Once you accept ground mounts as the answer, you just need enough garden space, roughly 35 to 50 square m² for a typical 4kWp system, and the site doesn’t even need to be flat, since the ground frame copes fine with gentle slopes.
From a maintenance point of view, this is where ground mounts genuinely win: cleaning panels at ground level needs no scaffolding, which is a real safety and cost difference compared with climbing onto a roof. And if you ever want to scale the system up, adding panels to a ground frame is far simpler than re-scaffolding a roof just to fit a few extra panels on.
Structures of Ground-Mounted Solar Panels
There are really two families of ground mounted solar panels worth knowing: rack-mounted and pole mounts. A rack-mounted setup uses metal framing holding the panels at a fixed angle, though some rigs can be adjusted manually a few times a year to track the seasonal shifting of the sun. A pole mounts design instead puts several panels on a single pole, elevating panels higher off the ground, and usually pairs them with tracking systems that tilt automatically to catch optimal sunshine all day.
Trackers genuinely lift production I’ve seen gains of 25% or more and you get to choose between single-axis, which follows the sun’s position through the day, and dual-axis, which also adjusts for seasonal variations. On the rack-mounted side, the appeal is being simple to install, generally cheaper, and easy to maintain compared with both roof-based and pole-based setups, though it is still more expensive than a roof and can be less efficient than pole-mounted panels, with fewer optional extras like solar trackers.
Pole mounts flip that trade-off: they take up less space, tend to be more efficient thanks to automatic trackers, and are easier to upgrade, but they cost more expensive than rack systems, and it’s harder to add more panels later, plus they are genuinely difficult to maintain compared with anything else on the ground. Whichever way you go, the structure matters as much as the panels — a metal A-frame set in a concrete base, or a pole that’s pile driven straight into the earth, a solar tracking system, a simple ballasted plastic box, or even a wooden frame doing double duty as outdoor storage and shading.
You can adjust pitch for the seasonal change in the angle of sunlight, and you get real freedom over layouts portrait, landscape, single height, or stacked rows with optimum orientation in the UK almost always facing south. Behind the scenes there are trenches for cabling, inverters to fit in, and careful spacing between rows of panels so nothing shades the row behind it.
Foundations decide how the whole ground-mounted solar system behaves over time. Ground screws, which are spiral piles driven 1–2m down, are fast, fully reversible, and my default choice on most jobs; concrete pads, cast in-place and needing a 3–7 day cure, suit heavier arrays; and ballasted blocks need no excavation at all, though they leave a heavy surface footprint where digging isn’t possible.
Advantages / Benefits of Ground-Mounted Solar
The biggest win with ground mounting is optimal panel positioning: you get complete control over panel angle and orientation, so you can hit the UK ideal of a 35° tilt facing south instead of settling for whatever roof installs happen to allow. That’s the textbook optimum, and it can lift annual output by 10–15% over a poorly-oriented roof install.
There’s also enhanced cooling to think about panels lose efficiency as they heat up, roughly 0.3–0.5% per degree above 25°C and because ground arrays get airflow on both faces, they simply run cooler than roof panels, which trap heat against the roof surface. In practice that real-world efficiency gain works out at 2–5% during summer exactly when generation matters most.
Then there’s easier maintenance access: ground-level access means cleaning, inspection, and repair never need scaffolding, ladders, or any roof safety equipment, which roughly cuts the maintenance cost in half over the system’s lifetime. Put it all together and you’re often looking at 5–15% higher efficiency for around 35–50 m² of space on a typical 4kWp system, across an expected system lifespan of 25+ yrs.
The advantage list keeps going orientation control, better cooling, easy maintenance access, no roof structural concerns, expandable system size, and no impact on home aesthetics all matter for homes with unsuitable roofs. A rooftop system is always restricted by the size and shape of the existing roof, while a ground-based array gives you the flexibility to build something properly optimised, even a bigger system, without worrying whether the roofs can take the weight and fixings of the panels.
A ground-based solar system can carry a tracker, benefits from open ventilation, and is simple to extend the system later if your energy needs change. This matters most for a household with high energy demands and not enough roof space — purchasing and installing ground panels instead lets you go for matching energy consumption without the usual restrictions.
Disadvantages / Drawbacks of Ground-Mounted Solar
Ground mounting is not suitable for every property, and it helps to be honest about the trade-offs before committing to a ground installation. You need 35–50 m² of usable land area, you may need planning permission past the 9 m² threshold, and there’s real ground preparation and foundations work involved, on top of potential shading from nearby vegetation and the visual impact the array leaves on your garden or wider land.
Security considerations matter more at ground level too, which is why installers fit tamper-proof clamps, and longer cable runs back to the house add extra cost. The system also takes up land that a roof would otherwise leave as dead space on the roof — though panels raised higher on a frame can still leave room underneath for wildlife or grazing, it can still be harder to find open land with no shading, which is why so many large arrays end up out in the countryside or on farms.
Ground-based components are also more vulnerable to theft than anything sitting on a rooftop, and the extra labour and materials needed to build the frame mean a higher upfront cost overall. It’s also worth remembering that rooftop panels quietly protect part of roof from weather and degradation, and add a layer of insulation that a ground array simply can’t offer.
Planning Permission
Most UK domestic properties fall under Permitted Development Rights, meaning you can skip a planning application altogether if the panel area stays under 9 m², roughly 4–5 standard residential panels. There are extra rules on height too stay under 4m above ground and domestic ground arrays are usually 1–2.5m tall in practice, kept away from the front of property facing a highway and tucked into rear gardens or side gardens instead.
Things change if the site sits in a conservation area, an AONB, or the grounds of a listed building those need consent regardless of size and you’ll also need it if the array sits within 5m of the property boundary and is visible from highway. Arrays above 9 m², most commercial ground arrays above 50 m², arrays more than 4m high, sitting less than 5m from a boundary, a whole array bigger than 9m², one that faces onto highway, land inside a world heritage site, or a case where it isn’t the first solar array on the property, all push both domestic installations and commercial installations into needing full consent.
A typical fee for a domestic application runs around £258, taking about 8 weeks to process, and your chance of getting permission often comes down to the support of solar shown by your local council. It helps enormously to favour brownfield or already undeveloped land over greenfield or agricultural land, protect biodiversity, and plan for a minimal environmental impact in case the array is ever decommissioned.
Maintenance
Routine maintenance is genuinely simpler than with rooftop installations, since everything happens at ground level. Cleaning panels here just means brushing off dirt, dust, leaves, and bird droppings that quietly chip away at efficiency, using nothing more than a soft brush, a sponge, or a hose.
Being closer to the ground does mean more risk of accidental damage, so I always recommend periodic inspections to catch cracks, loose wiring, or corrosion early, and in winter, clearing snow and ice is far easier on ground-mounted arrays than on rooftops, helping keep consistent energy production through the colder months. Annual professional inspections also confirm the mounting structures and electrical components are still working properly.
A simple annual visual inspection is really just a 20-minute job checking for vegetation regrowth, panel surface dirt, frame corrosion, or cable damage and I’d clean the panels every 12–24 months using pure water, never no pressure washer or harsh chemicals. Add a 5-yearly professional service covering electrical testing, an inverter check, and frame integrity, priced around £150–£250, plus ongoing vegetation control to stop growth within 1m of the array footprint from casting shading and eating into your yield.
Ground Mount vs Roof Mount
Side by side, the numbers tell their own story. Install cost for a 4kWp system runs £9,000–£16,000 on the ground against £8,000–£12,000 on a roof, yet annual generation on the ground climbs +5–15% thanks to the optimal angle, compared with a roof’s fixed baseline.
Space required also differs 35–50 m² garden for ground mounting versus 20–25 m² roof for a roof system and day-to-day maintenance favours the ground too, with easy ground access replacing a scaffold or awkward roof access. Planning permission stays simple under PD below 9 m², and roof jobs are usually typically OK without any application at all.
Expansion potential is far more straightforward on the ground, while a roof system may need re-scaffold just to add a couple of extra panels. In the end, ground mounting suits properties with garden space and a suboptimal roof, while roof mounting still works best for standard properties with a good south-facing roof.
Neighbours
It’s always worth taking the time to consult anyone living near you before starting a solar installation, since not everyone will appreciate a big glass display appearing in your garden. I’ve also seen neighbours grow designs on an apple tree that, a few years later, quietly began to deprive an array of power through shade nobody planned for.
UK Building Regulations and MCS Certification
Part P electrical safety rules mean every bit of AC-side work needs a qualified electrician, and DC work must also come from a competent installation to meet the standard. MCS certification is non-negotiable too, since it decides your SEG eligibility for the Smart Export Guarantee.
On the grid side, DNO notification follows one of two routes: G98 for anything post-install under 16A, or G99, which needs approval pre-install for anything over 16A.
Step-by-Step Ground Solar Installation Process
I usually run a UK domestic ground-mount install as a tidy 8-step process, taking about 2–4 days end-to-end. To save real site time, I trench cable runs at the same time as digging foundations, so the foundation stage and the mounting-frame stage overlap in the same garden almost from day 1.
Step one is simply to clear vegetation, level rough ground where it’s needed, and mark out array footprint using string lines and measured stakes before we confirm layout. Step two puts foundations in — usually ground screws, which are spiral piles driven 1–2m down and genuinely fast and reversible, though concrete pads, cast in-place with a 3–7 day cure, or ballasted blocks needing no excavation but leaving a heavy surface footprint, both remain options.
Step three bolts aluminium or galvanised steel frames onto those foundations — we bolt everything down and set the tilt angle to roughly 30–40° depending on your latitude and any shading nearby. Step four sees the panels clamp onto the frame rails, secured with tamper-proof end clamps as standard on all ground installs.
Step five handles the electrics: panel-to-panel and panel-to-string DC connections, plus lightning protection and isolators built into the array, all done under qualified electrician supervision in line with BS 7671. Step six digs a 600mm trench from the array back to the house, running armoured cable through conduit.
Step seven fits the inverter, often in a garage, utility room, or a proper weatherproof outdoor enclosure, before the AC connection joins the consumer unit to complete grid integration, with monitoring equipment set up at the same time. Step eight is comprehensive electrical testing to confirm safe operation, checking system performance against design expectations, and finishing off the documentation, including electrical certificates, DNO notification, and MCS certification — the same process, by the way, that applies to commercial solar panels, just at different costs, payback, and scale for larger grid applications and business installs.
DIY vs Professional Installation
The question of DIY ground solar UK versus professional installation really comes down to regulations, safety, and long-term value. You can safely handle ground clearance, vegetation removal, marking out array footprint, hand-digging if you’re going the concrete-pad route, and general site preparation yourself.
Everything past that needs a professional: DC and AC electrical work under Part P, foundation installation because it’s genuinely load-bearing structural work, and inverter commissioning and isolation. You also can’t self-issue an MCS certificate, and someone still has to file the G98/G99 DNO notification on your behalf.
This is the real MCS trade-off: only certified installs qualify for the Smart Export Guarantee, so DIY work quietly switches off that income, usually worth £100–£300/year, or £2,500–£7,500 across a 25-year system life. That number dwarfs whatever small upfront savings you’d get from skipping an MCS-certified install.
Grid Connection and Smart Export Guarantee
DNO notification again splits into G98, filed post-install for systems under 16A, and G99, which needs pre-install approval for anything over 16A, typically taking 3–6 weeks. From there, SEG setup just means picking a supplier think Octopus, Bulb, or EDF and handing over your MCS certificate and meter details.
Payments usually start within 1–2 months, and rates can range from 5p–25p/kWh depending on the tariff you’re on, so it’s worth reading an Octopus Agile solar guide if you want to maximise SEG income.
Common Ground-Mount Install Mistakes to Avoid
The biggest mistake I see is skipping site survey and trying to get a quote online instead, which completely ignores real shading and ground conditions. A close second is choosing wrong foundation: concrete pads drift on soft clay over time, while ground screws can bend if you try to install them in truly stony ground, so the foundation always has to match the actual ground.
Undersizing cable run is another classic error long runs need a bigger cable, or you end up with voltage drop and inverter underperformance. Skipping no MCS certification simply eliminates SEG income for the entire life of system, which adds up to £2,500–£7,500 lost over 25 years.
The final one is ignoring future shading: a tree that sits 4m away today can be 10m away in just 8 years as it grows, so always plan for what the site will look like in a full decade, not just this summer.
Ground Mounted Solar panels Bifacial
Bifacial panels are solar PV modules with exposed cells on both the front and the rear, and in a proper ground mount setup they generate power from direct sunlight hitting the front and reflected sunlight or diffused sunlight bouncing off the ground onto the back. The output uplift depends heavily on albedo, meaning the reflectivity of the ground surface beneath the array.
Over plain grass, I’ve seen the increase sit around 4%, while switching to white pebbles as ground cover pushed that figure up to 8%.
FAQ’S
Can I install ground-mounted solar panels in the UK?
You don’t need planning permission for arrays smaller than 9 m², roughly 4–5 panels, since these fall under Permitted Development. Larger arrays, anything in an AONB or conservation areas, listed properties, and ground mounts sitting within 5m of a highway all need a full planning application.
How much does a ground-mounted solar system cost in the UK?
Typical domestic ground arrays cost £9,000–£16,000 for a 4–6kWp system, which is around £1,000–£2,500 more than a comparable roof install. That extra cost covers foundations, longer cable runs, and a heavier frame, while commercial ground arrays in the 10–200kWp range start from about £25,000.
Do ground-mounted solar panels need planning permission?
Under UK Permitted Development, freestanding arrays up to 9 m² and 4m high don’t need planning permission, as long as they avoid a conservation area, AONB, or listed-building grounds, and stay clear of 5m from a highway. Go past those thresholds and you’ll need an application, usually taking around 8 weeks.
Are ground-mounted solar panels more efficient than roof panels?
Ground arrays are often 5–15% more efficient because you control the angle and can orient optimally, typically at 35° south-facing, and the panels run cooler thanks to airflow on both sides. That extra ground-mount yield usually pays back the install premium quickly, especially on roof-constrained properties and shaded-roof properties.
Can I install ground-mounted solar panels myself?
You can handle the groundwork and frame assembly yourself, but panel wiring must go to a qualified electrician under Part P. Only MCS-certified installations qualify for SEG, so going full DIY simply cuts off your export income.